


Haitec Resources
As distributors of Haitec K-Cup filling and sealing machines, we offer valuable resources to our customers to help ensure optimal setup and operation.
The below-listed resources include a YouTube library with overview and instructional videos, as well as first-use and operational manuals.
Also check our ever-growing troubleshooting section at the bottom of this page to help you quickly resolve common issues.
For further assistance, reach out to us at 855.585.2500 or support@coffeeequipmentpros.com.
VIDEOS
CEPros Review of Haitec HT-F20RS "Mini"
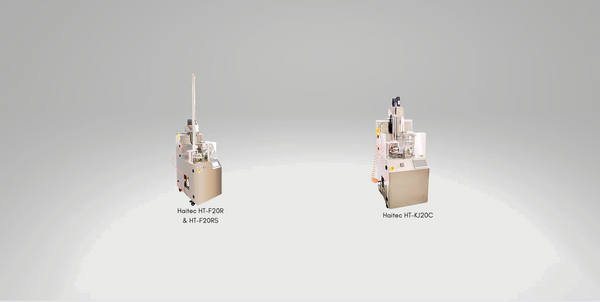
Our own Rick D. shines a spotlight on all the features we adore in the Haitec HT-F20RS (and HT-F20R) K-Cup Filling and Sealing machine. Affectionately named the "mini" for its compact size, but make no mistake—this petite powerhouse packs a punch—kicking out 25 CPM!
View Haitec's 11-video playlist on CEPros' YouTube Channel
This playlist, totaling less than 15 minutes, walks you through machine start-up to operating the machine's first run of your K-cups.
MANUALS
Haitec "Mini" K-Cup Machine First-Use Guide
This guide prepared by CEPros walks you through everything needed to set up your Haitec HT-F20R (12-15 CPM) or HT-F20RS (15-25 CPM) K-Cup Filling and Sealing machine—from equipment and area prep to machine setup and startup.
HaiTec HT-F20R and HT-F20RS K-Cup Machine Operation Manual
This manual provided by Haitec covers all aspects of setting up and running your Haitec "Mini" machine, including direct links to Haitec's short instructional videos for additional instruction.
HaiTec HT-KJ20 Nespresso Machine Quick Start Manual
HaiTec HT-KJ20 Nespresso Machine Operation Manual
These two manuals provided by Haitec assist in the startup and operation of the Haitec HT-KJ20 automatic Nespresso filling and sealing machine.
WARRANTY & SUPPORT
WARRANTY:
View manufacturer warranty details, including parts and support, HERE.
SUPPORT
Since automated machines have many moving parts, support may be required. We understand the importance of keeping your machine running smoothly, so we've established a 4-level support system to ensure its continuous operation:
1) Level 1: CEPros
2) Level 2: North American Haitec representative
3) Level 3: Haitec manufacturer in China
4) Level 4: USA technician
Process
When you identify an issue you cannot remedy, please contact us at CEPros immediately to begin the support process. We are set up to handle most issues remotely and with video support as needed.
WhatsApp mobile communication application will be needed. Please download and set up account with your cell number prior to appointment.
Note that our first 3 support levels include virtual support at no charge. If a technician is needed on the ground, a fee for their labor (including related travel expenses) applies. (Reminder: Haitec’s one-year warranty covers parts, not labor.) We have structured our support process so that, ideally, your issue can be solved without needing technician services.
-
You can text or call Rick directly at 949-289-8083 or email at rick@coffeeequipmentpros.com. He will assist you through the situation, sometimes using video of the machine's issue that he may request you to provide with his guidance.
- If necessary, we will escalate to the next support level and involve our North American Haitec representative, who is located in the Central Time Zone, like us at CEPros.
- In some cases, the North American representative may need assistance from our manufacturer's engineering team in China. Please note the 13-hour time difference. To escalate to this level of support, appointments need to be scheduled. Due to this time difference, these appointments are generally scheduled between 6 a.m. and 11 a.m. CST (primary window) or between 7 p.m. and 10 p.m. CST (backup window).
- Automated packing machine technicians are available in the USA but rarely needed.
- Finally, we can ship a needed part with expedited freight.
Troubleshooting
Quick answers to head-scratching issues.
General Operational Issues
Machine won't operate, error message showing
1. Identify and repair the issue from the error message (e.g., jammed cup, low/no air pressure, out of cups, out of lids, etc.).
2. Then reset the machine and clear the error message:
a. Push the red Stop button on the LCD screen.
b. Push the Reset All button located above the red Stop button. Make sure there is nothing obstructing the table as pushing this button will rotate the table one full turn.
c. Turn off main machine switch. Wait 10 seconds. Turn back on.
Auger stopped dropping coffee
There are a couple of reasons why this may be happening: Either coffee is stuck in the hopper, or the machine needs a reset due to an automation error. Follow these steps to troubleshoot:
1. Coffee is stuck in hopper.
a. Move hopper to drop position.
b. Remove hopper.
c. Check and clean, especially down at bottom snout where the star-wheel is at end.
d. Replace and retry.
2. Machine needs main restart.
a. Could be caused by a prior table rotation error due to cup jamming.
b. Can be confirmed by an error code in back machine cabinet on one of the servo units displaying "e100."
c. Clear any obstacles.
d. Turn off main switch.
e. Wait 10 seconds.
f. Turn back on.
g. Test.
Table stops after cup drop station before auger coffee filling station
It could be that the cup in mold sensor is not not operating.
1. Clean top of sensor located on the table directly under the mold hole which is one position after the cup drop mold.
2. Test.
Jog not working
1. On your LCD touch screen, check for either error or notification messages.
a. Note message.
b. Correct issue of report.
c. Machine may need a reset.
2. Reset:
a. Push the red LCD stop button.
b. Push the "reset all" button.
Important! Make sure nothing is in the way of the table when doing this as the table will rotate a complete turn after pushing the button.
c. Turn off main button. Wait 5 seconds. Turn back on.
Cup Issues
Product in cup has inconsistent fill
80%-90% of all grinds will work with the supplied auger. If inconsistency of coffee grinds dropping into cup becomes an issue...
TRY THIS:
1. IF your auger snout is blocked with plugs, clumps, or obstacles,
THEN Clean your hopper.
2. IF high-humidity conditions are causing coffee grounds to clump,
THEN reduce humidity in area of machine operation. Follow up by cleaning the hopper and testing.
3. IF your grind is not matching the standard supplied auger,
THEN, increase or decrease your coffee grind micron size.
If the above troubleshooting steps don't work, then contact us as a different auger to match your required or desired grind may be necessary.
Coffee is not going into center of cup
Auger is not centered over cup mold in drop position.
TRY THIS:
1. Loosen the stop blocks up top on auger positioning rail.
2. Stand in front of the machine and look straight at the auger over the table.
3. The snout should be positioned perfectly in center of the mold.
4. Retighten stop blocks.
Cup exit is not kicking cup out correctly
There are usually two reasons why this is happening:
1. Not enough spray pressure after filling and lid sealing.
a. Turn the thumb screw adjustment on the blue hose that connects to the air spray hole to allow more air spray on exit.
2. Cup exit is shooting too far off table.
a. Turn the thumb screw adjustment on the blue hose that connects to the air spray hole to reduce the air spray on exit.
Lid Issues
Lid positioning is off
You need to re-align the rotating cam stand. To do this:
1. Slightly loosen the 4 Allen head tightening bolts on the front of the rotating cam where the indentation area is located allowing the lid to flip over during travel.
2. With the lid arm in the down position, ease the cam one way or other to adjust alignment to the center.
3. Re-tighten Allen bolts.
4. Test.
Lid sealing heater display not showing/heater not operating
1. Make sure the main large red "emergency" button is not depressed. If so, simply turn it slightly to the right. It will pop out and re-engage the heater.
2. Check circuit breaker in back cabinet.
The "LID ON" sensor is not working and stopping machine
When this happens, then the "LID ON" sensor needs adjusting. Follow the below steps:
1. Loosen the Allen head bolt to allow swiveling and up/down travel on the support arm.
2. With machine on, position the sensor directly in the center of cup mold.
3. Lower until red light goes on. This is now in lid detection status.
4. Position the sensor down just a touch more, retighten.
Lid does not have clean edge after sealing
Lid sealing heater may be too hot or not hot enough.
1. Turn temperature up or down on digital display.
2. Typical heating temperature is between 190 and 200 degrees F.